
Configure webhooks for all care flows
Set up an outgoing webhook once in CareOps and it applies to every published care flow, with its own events, custom headers and a test endpoint.
A webhook set up in CareOps applies to every published care flow at once. That saves adding the same webhook to each flow by hand, and it keeps working when someone publishes a new one.
This is the organization-wide version of Configure webhooks in Studio, which sets a webhook on a single care flow. The two add up rather than replacing each other: a care flow gets the organization's webhooks and its own.
Where they live
Open Integrations from the left navigation, then the Outgoing webhooks tab.
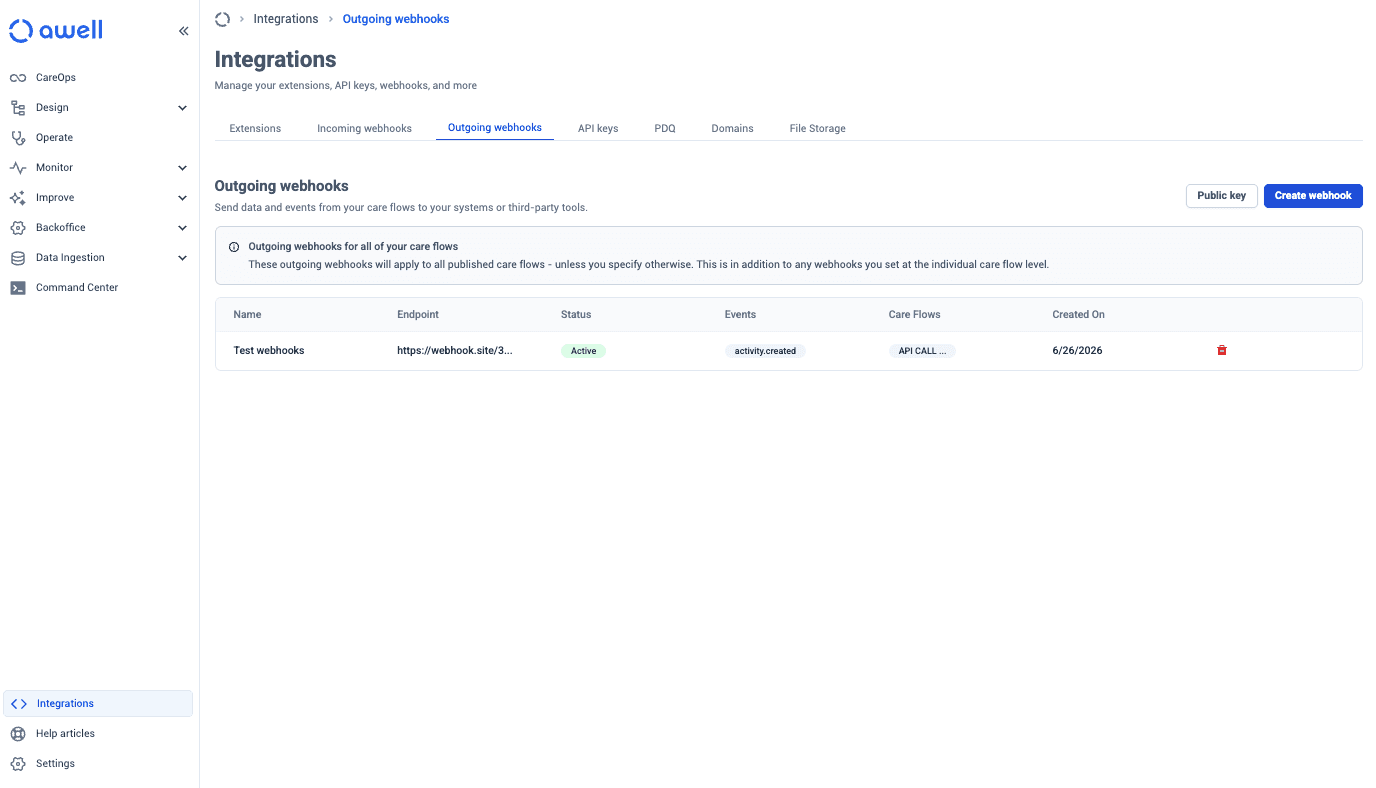
The list shows each webhook's endpoint, whether it is Active, which events it subscribes to, and which care flows it covers.
Create one
Click Create webhook.
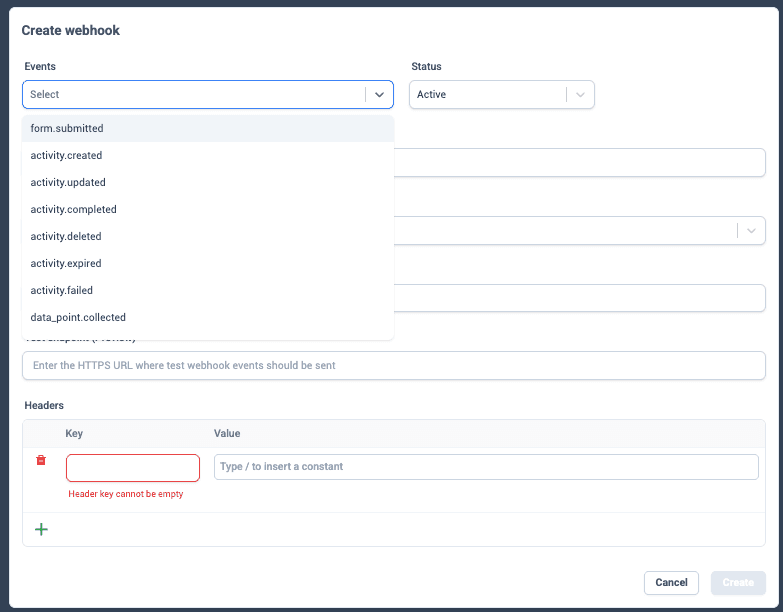
- Events — choose which events to send. Pick deliberately; sending everything leaves the receiving system to work out what matters. Every event is listed in the Webhook event catalog.
- Status —
Activesends events. Switching it off pauses delivery rather than queuing it. - Endpoint — the HTTPS URL events are posted to.
- Test endpoint — optional, and worth using. Point test events somewhere separate before you send anything to production.
- Headers — custom key/value headers sent with every request, for an API key or a routing value
the receiving system needs. Typing
/in a value inserts a constant. A header with an empty key will not save.
Verifying that Awell sent it
Every outgoing webhook is signed with a 2048-bit RSA key pair held for your organization. Awell
signs with the private key and sends the signature in an x-awell-signature header; the
receiving end verifies it with the public key.
The Public key button on this tab shows that key as a PEM block. It is the same key for every outgoing webhook in the organization, whether it was set up here or on a single care flow — there is no per-webhook secret.
A public key is not a secret. It can go in a config file or a repository like any other public key. Only the private key could forge a signature, and that never leaves Awell.
Awell also only delivers to HTTPS endpoints, and the custom headers above are a second way for the receiver to check the source — put a token in one and validate it on arrival.
See Receive webhook events for the verification step by step.
Next steps
Next: Receive webhook events — build the endpoint on the other end, verify the signature, and handle repeats and retries.
Configure webhooks in Studio
Turn webhooks on for a care flow, give the receiving engineer the public key they verify with, and check whether what was sent actually arrived.
Webhook event catalog
Every event Awell can send to a subscribed endpoint, grouped by what it is about, with what each one reports and what it does not.