
Create and name a step
Add a step to a track, name it so a colleague understands it, and learn what a step actually holds.
A step is the building block of a track: a container holding the actions that happen at one moment for one group of people.
Create a step
- In the left sidebar of Studio, hover over the New step icon.
- Click it, then either drag the step onto the canvas or click the canvas to place it.
- Double-click the step, or click the three dots in its top-right corner and choose Edit, to open the step context menu.
- Rename the step there.
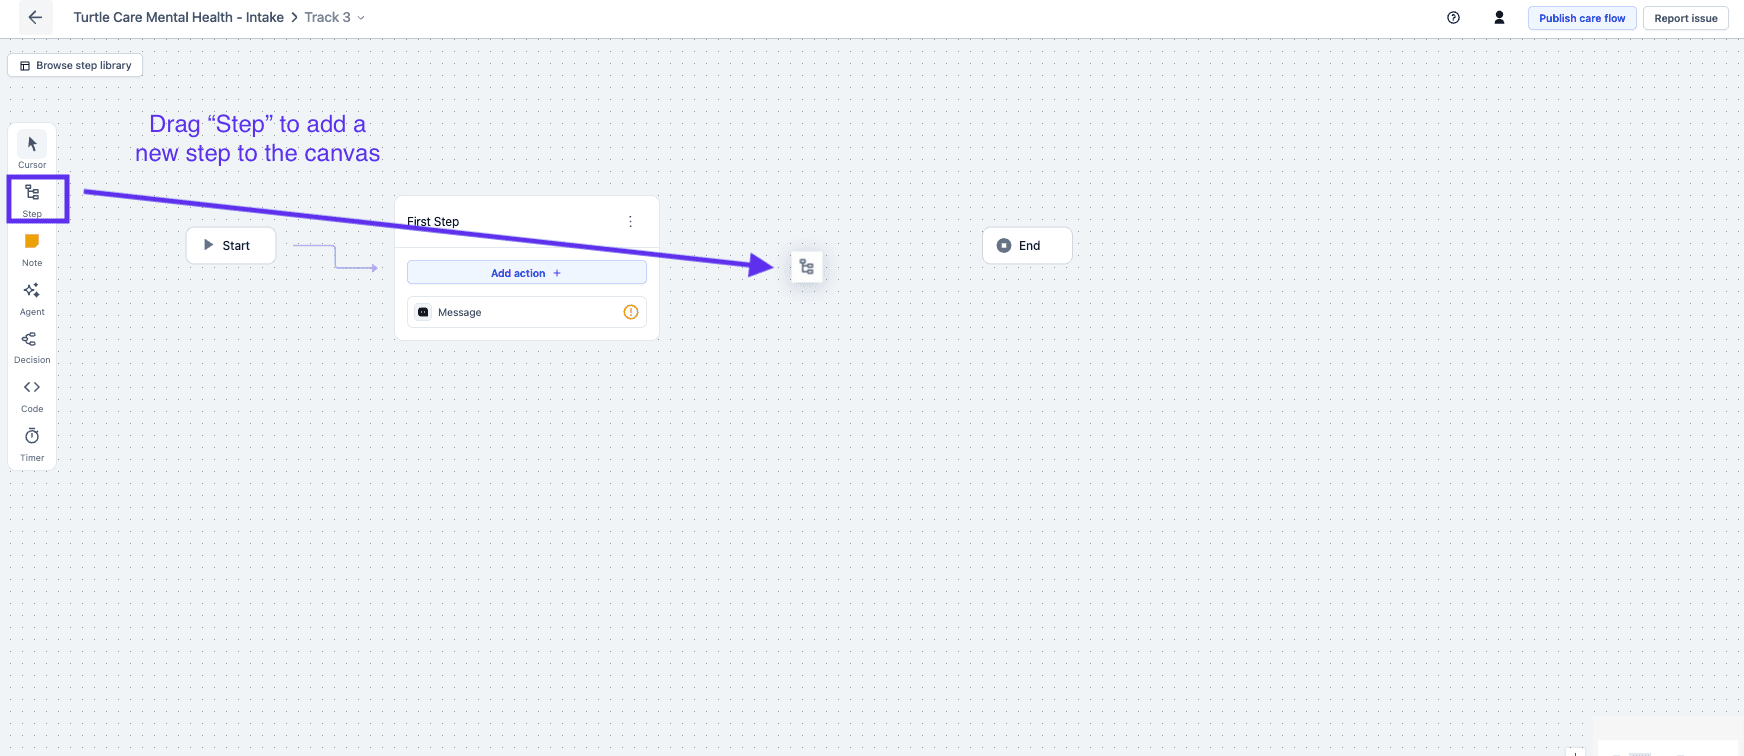
The palette on the left holds everything that can go on the canvas: steps, notes, agents, decisions, code and timers.
Keyboard shortcut: Ctrl + S adds a step to the canvas.
Name it for the person who didn't build it
"Step 4" tells a colleague nothing, while "Collect baseline patient-reported outcomes" tells them what happens and roughly why. Care flows outlive the people who build them, and the step name is the first thing a clinician sees in the activity feed.
A step does nothing until it holds actions
Each action is a piece of content or work assigned to someone:
- an in-app message, say to introduce the care flow to a patient
- a form, say for a nurse to record baseline data
- a calculation, say to check age eligibility before continuing
Next steps
Next: Duplicate steps, which is faster than building a near-identical step from scratch.